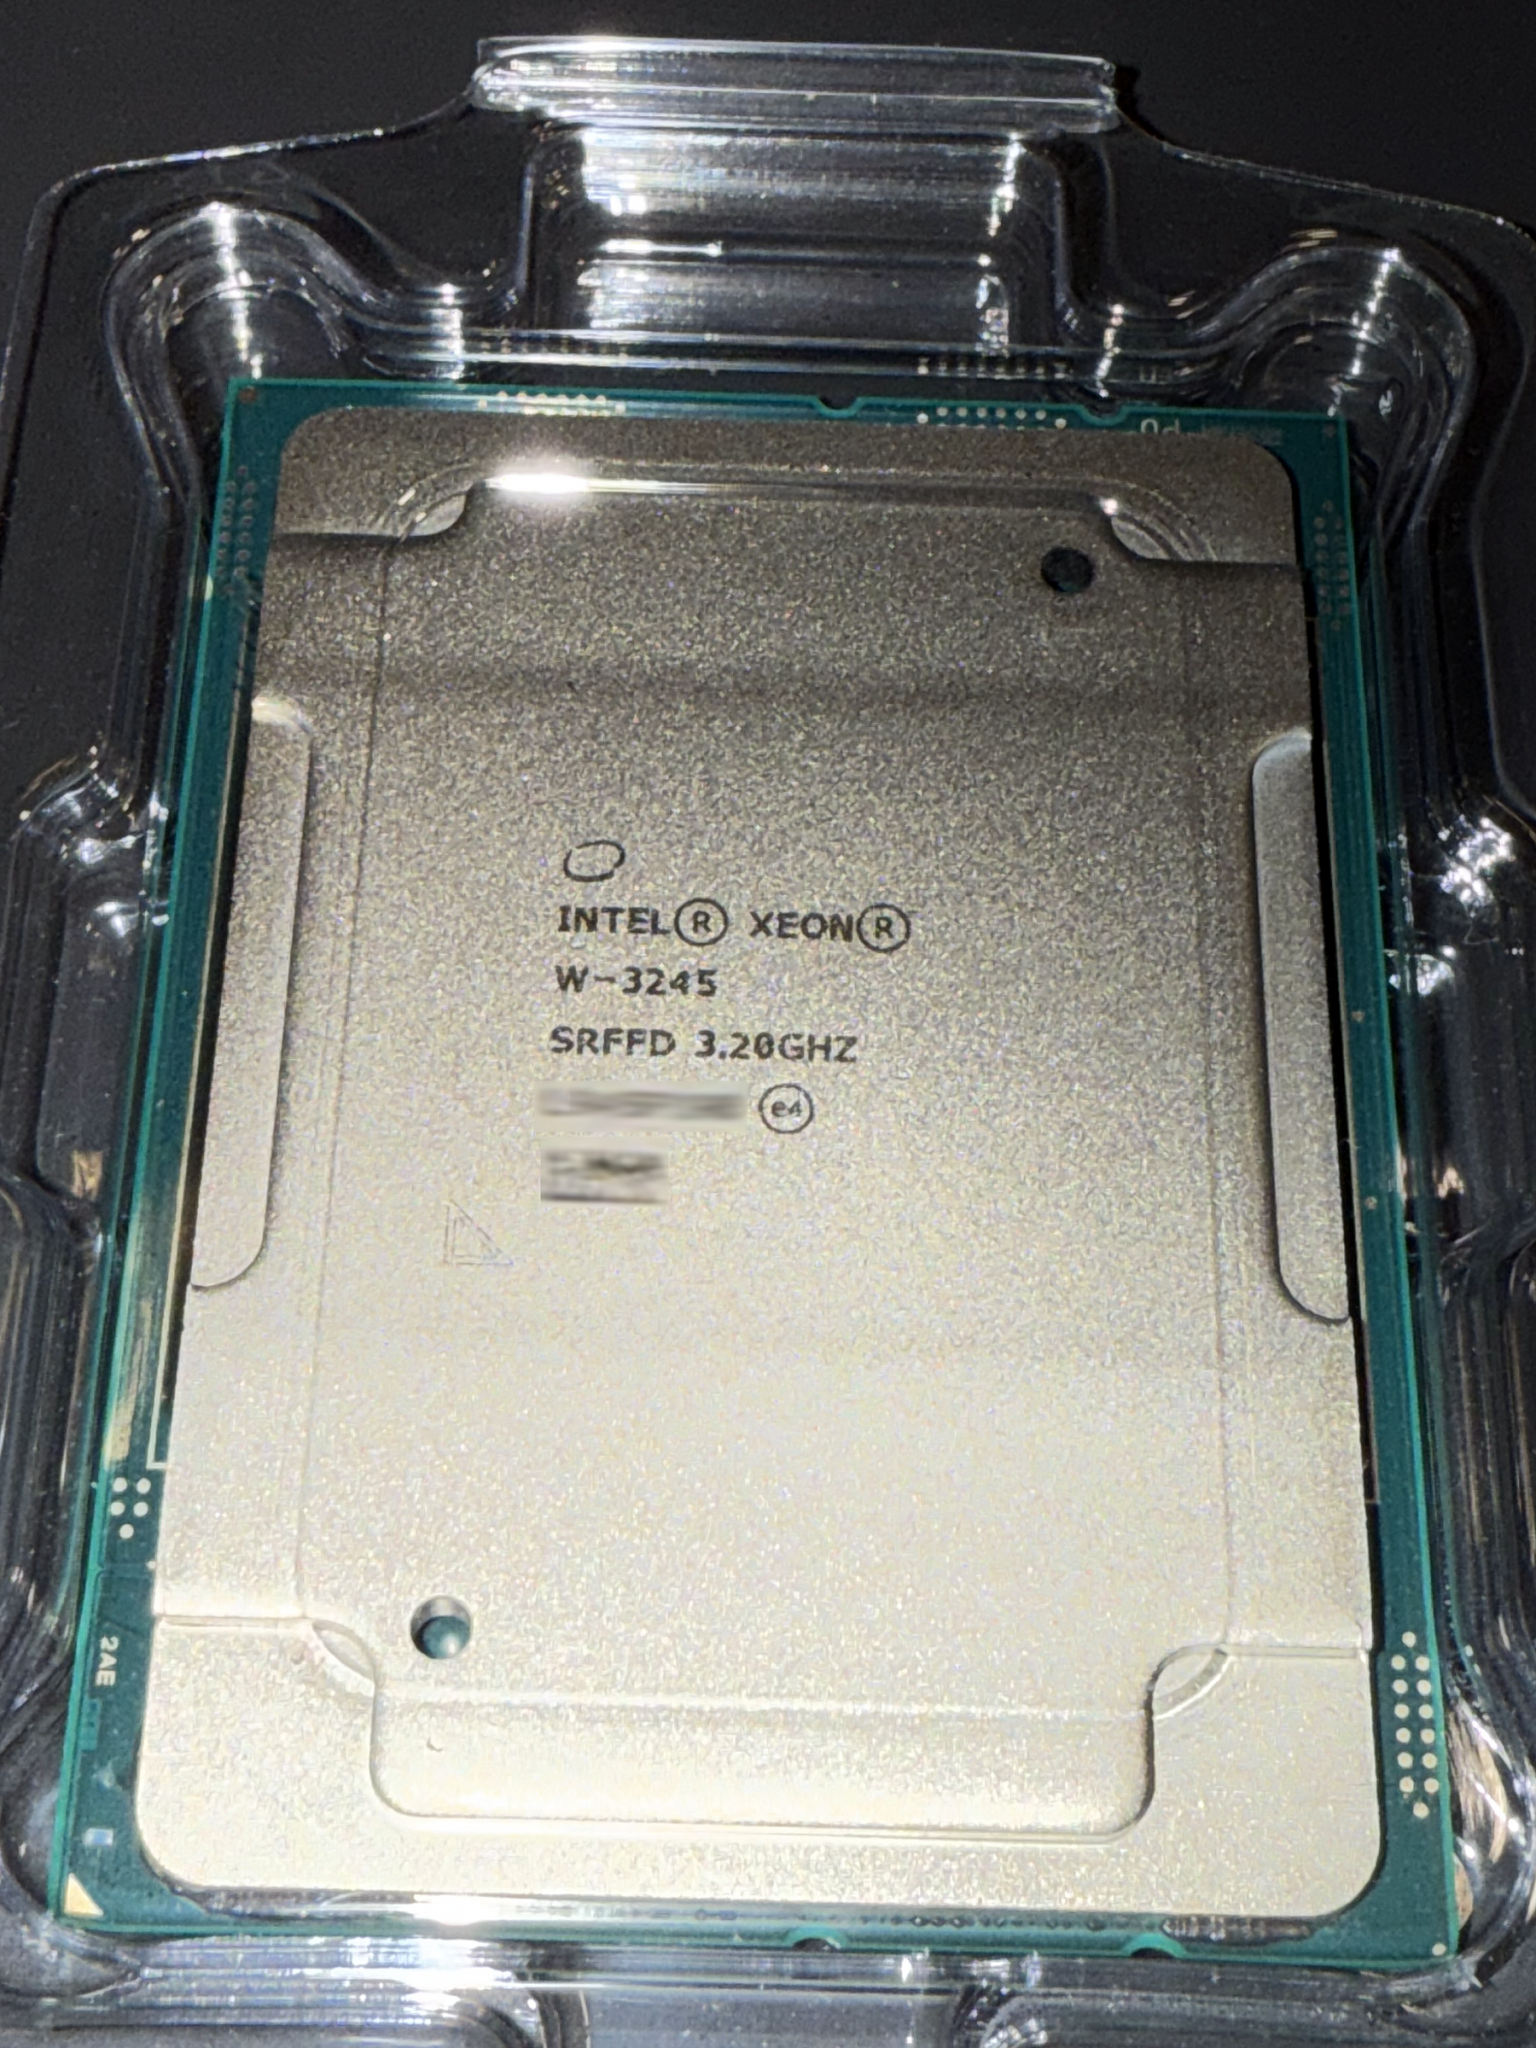
I had to wait for this long (12″/300mm) T-15 torx screwdriver (part of a set) to come in before I could perform this Xeon W-3245 “brain transplant” in my 2019 Mac Pro (which has the base Xeon W-3223 8-core processor).
The switch out was simple (requiring removal of the heatsink covering, unscrewing the heatsink to allow lifting it off the logic board, removing the processor retaining clip, and removing the processor from the socket).


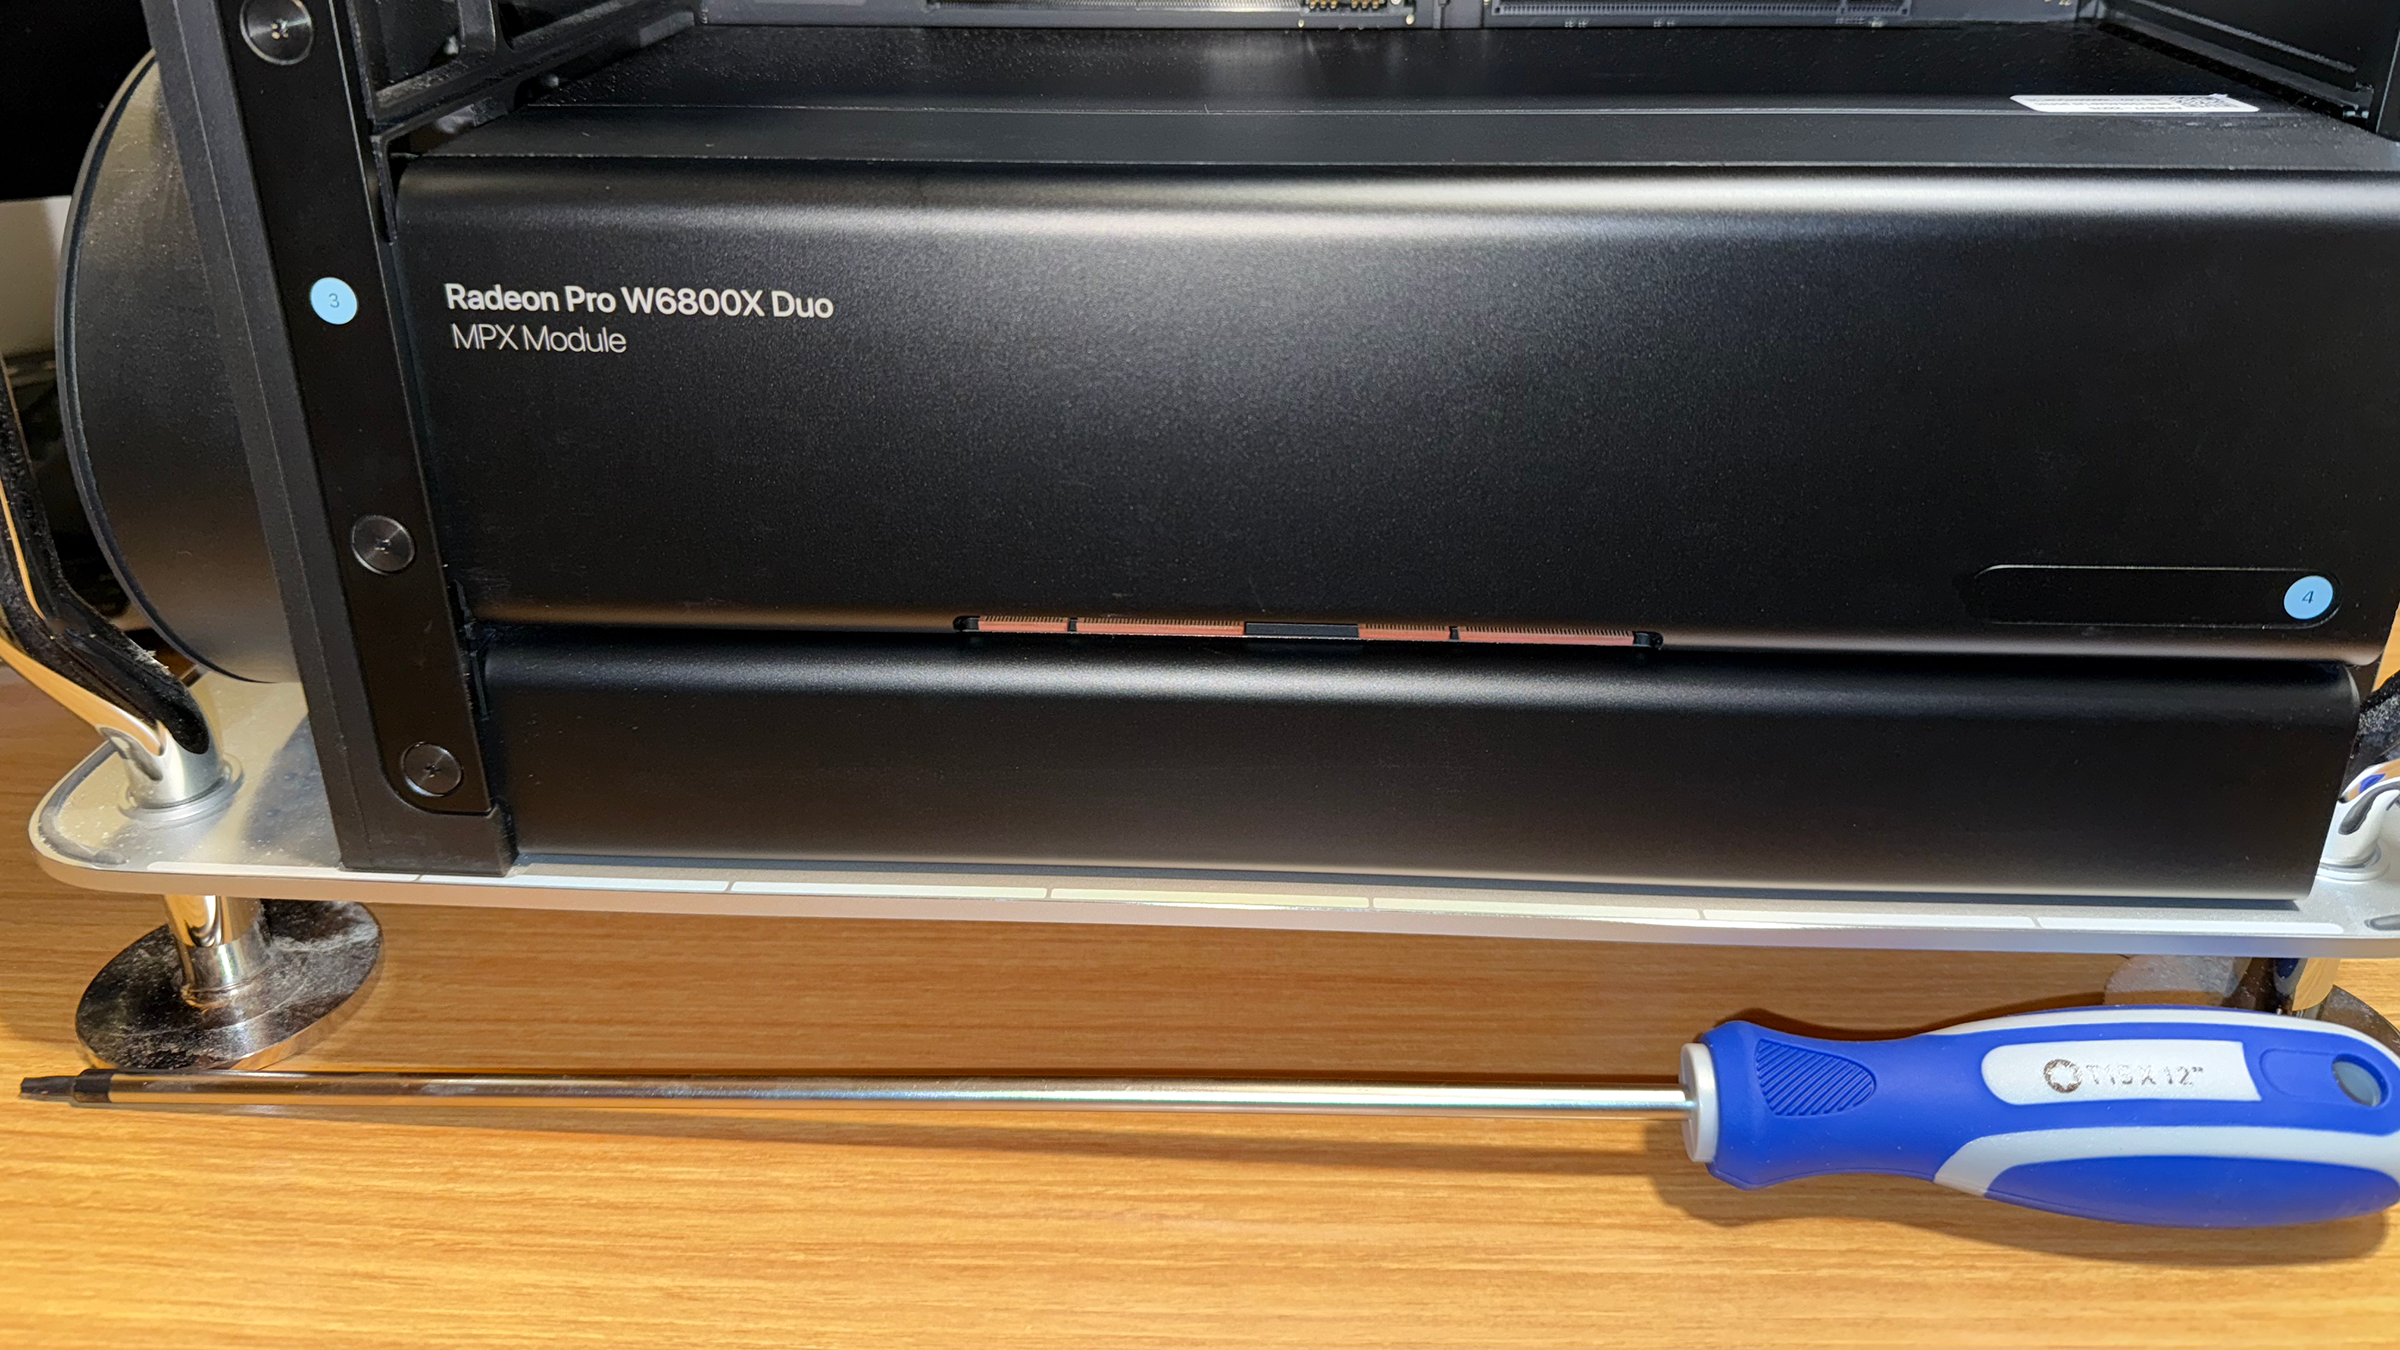
The heatsink covering is secured by 4 torx screws (two longer ones at the top and two shorter ones underneath).

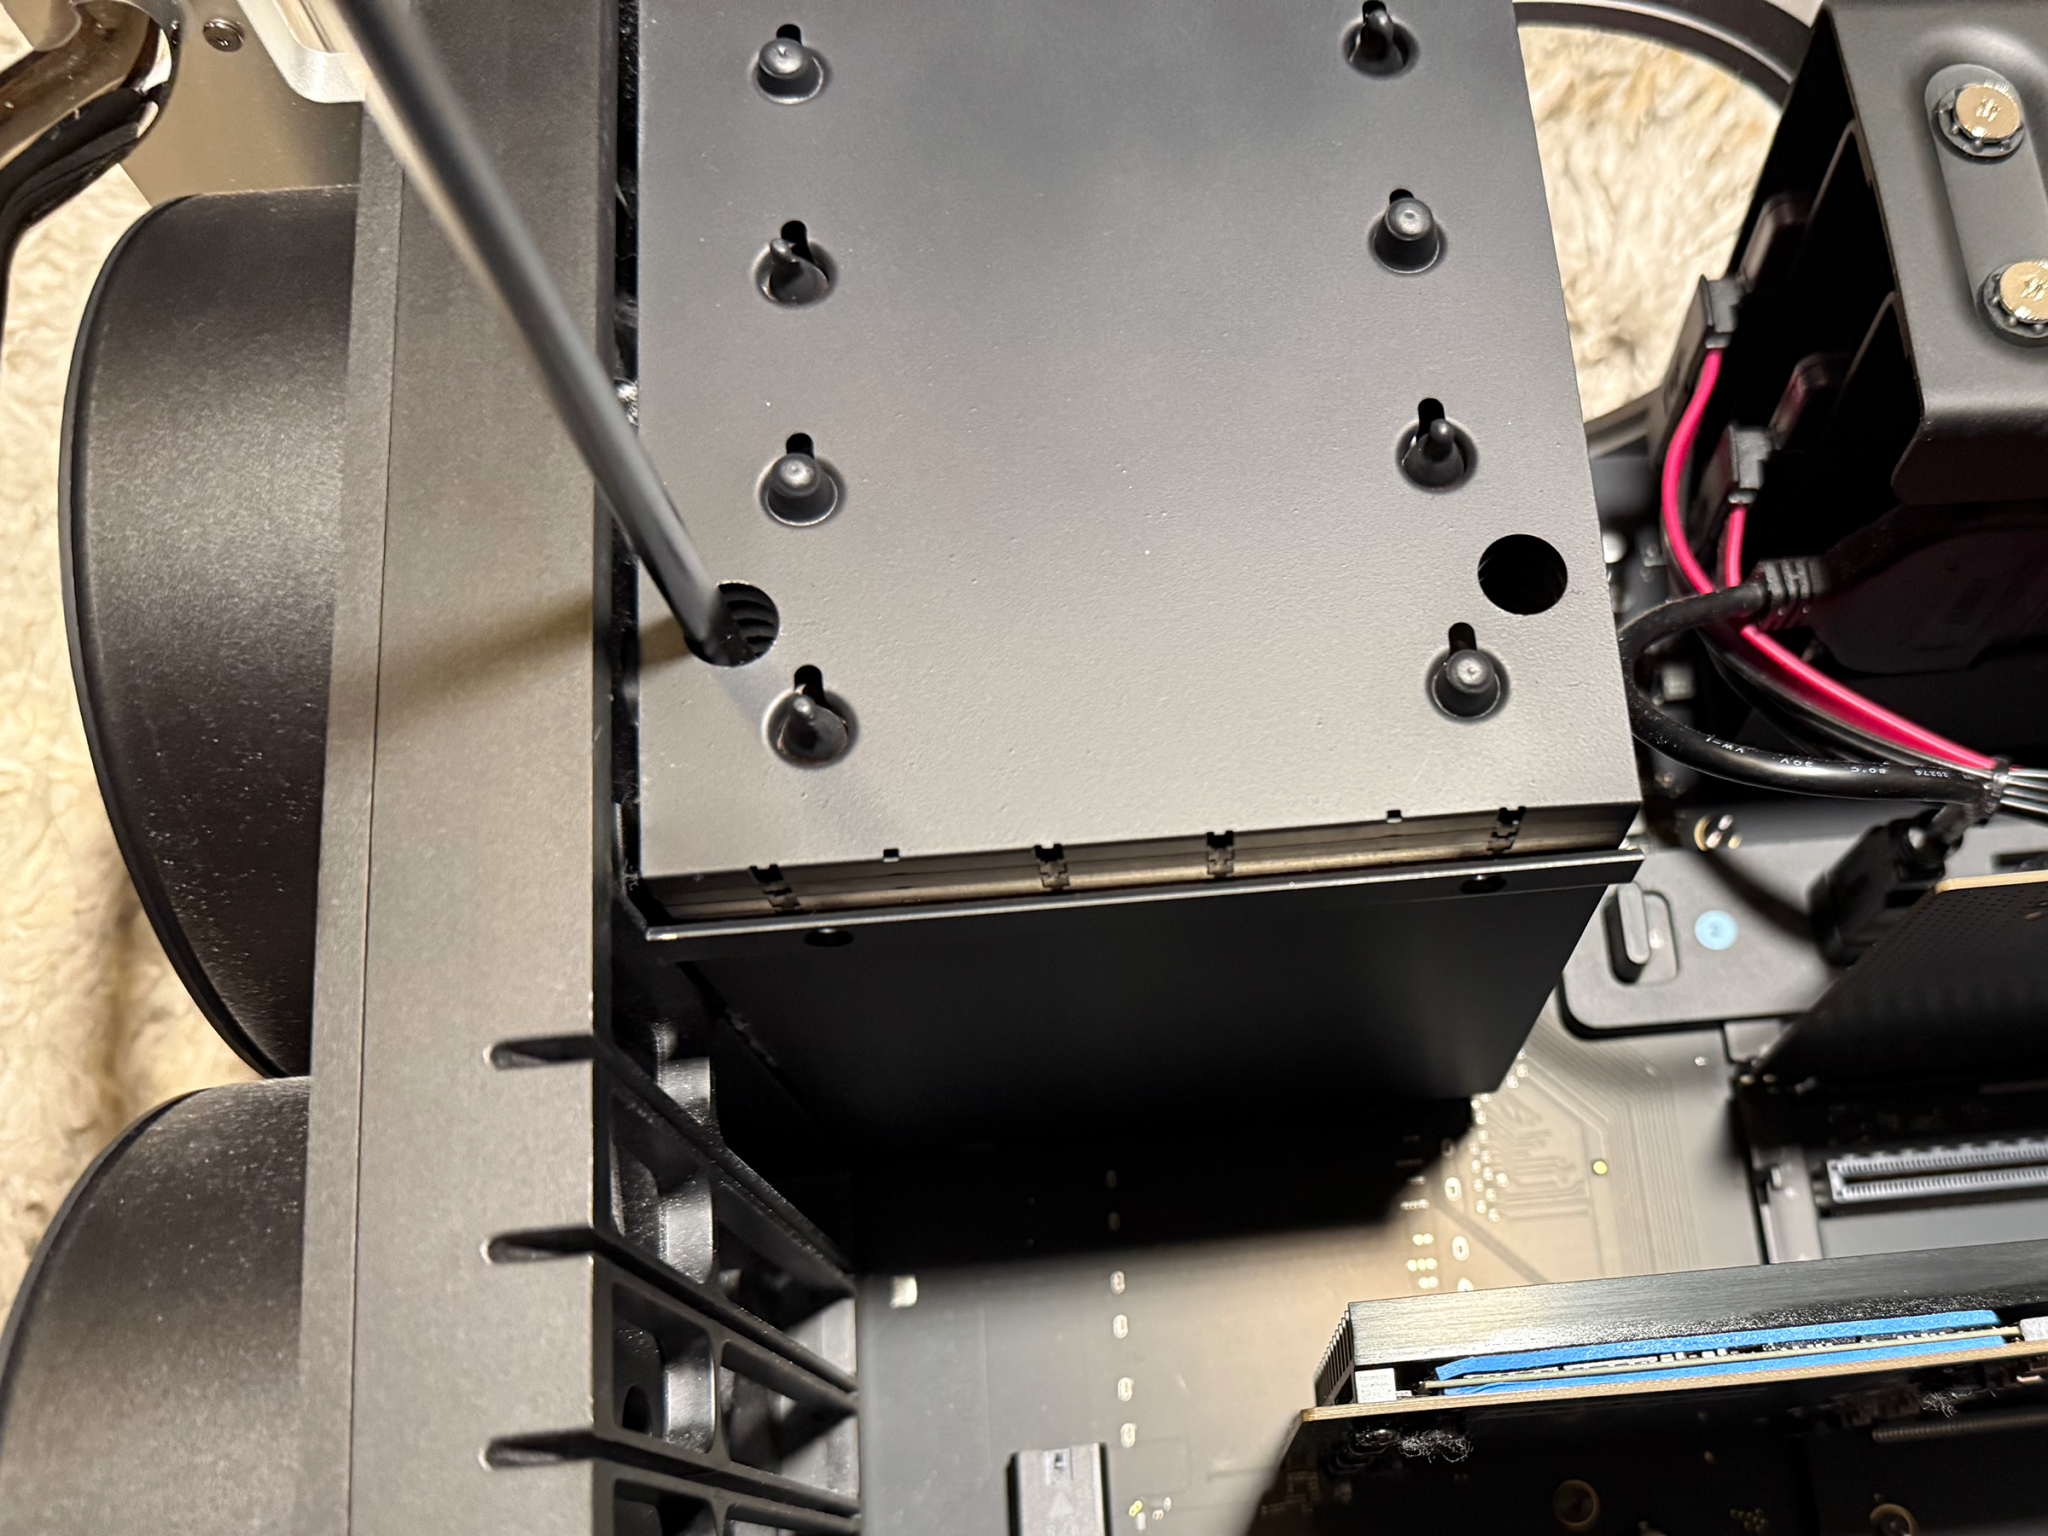
With the heatsink cover removed, the two T-15 torx screws securing the heatsink to the logic board needs to be removed (where the longer driver is needed). The torx driver I had was long but also just a little too short (thus the need for me to buy these longer ones from Amartisan Tools; a 6-piece set can often times be found new on eBay for $16). It took a little bit of fiddling to get the end aligned by feel. Once unscrewed, the heatsink needed to lifted out (the top part has a guide).


The old thermal paste needs to be cleaned off the heatsink (copper) plate. I used alcohol prep pads. The processor is held in place by a retaining clip which can be squeezed by hand on the right-side to unloosen and remove it. If using a long-nosed plier or screwdriver, care needs to be taken to not accidentally slip (don’t want to damage the logic board).


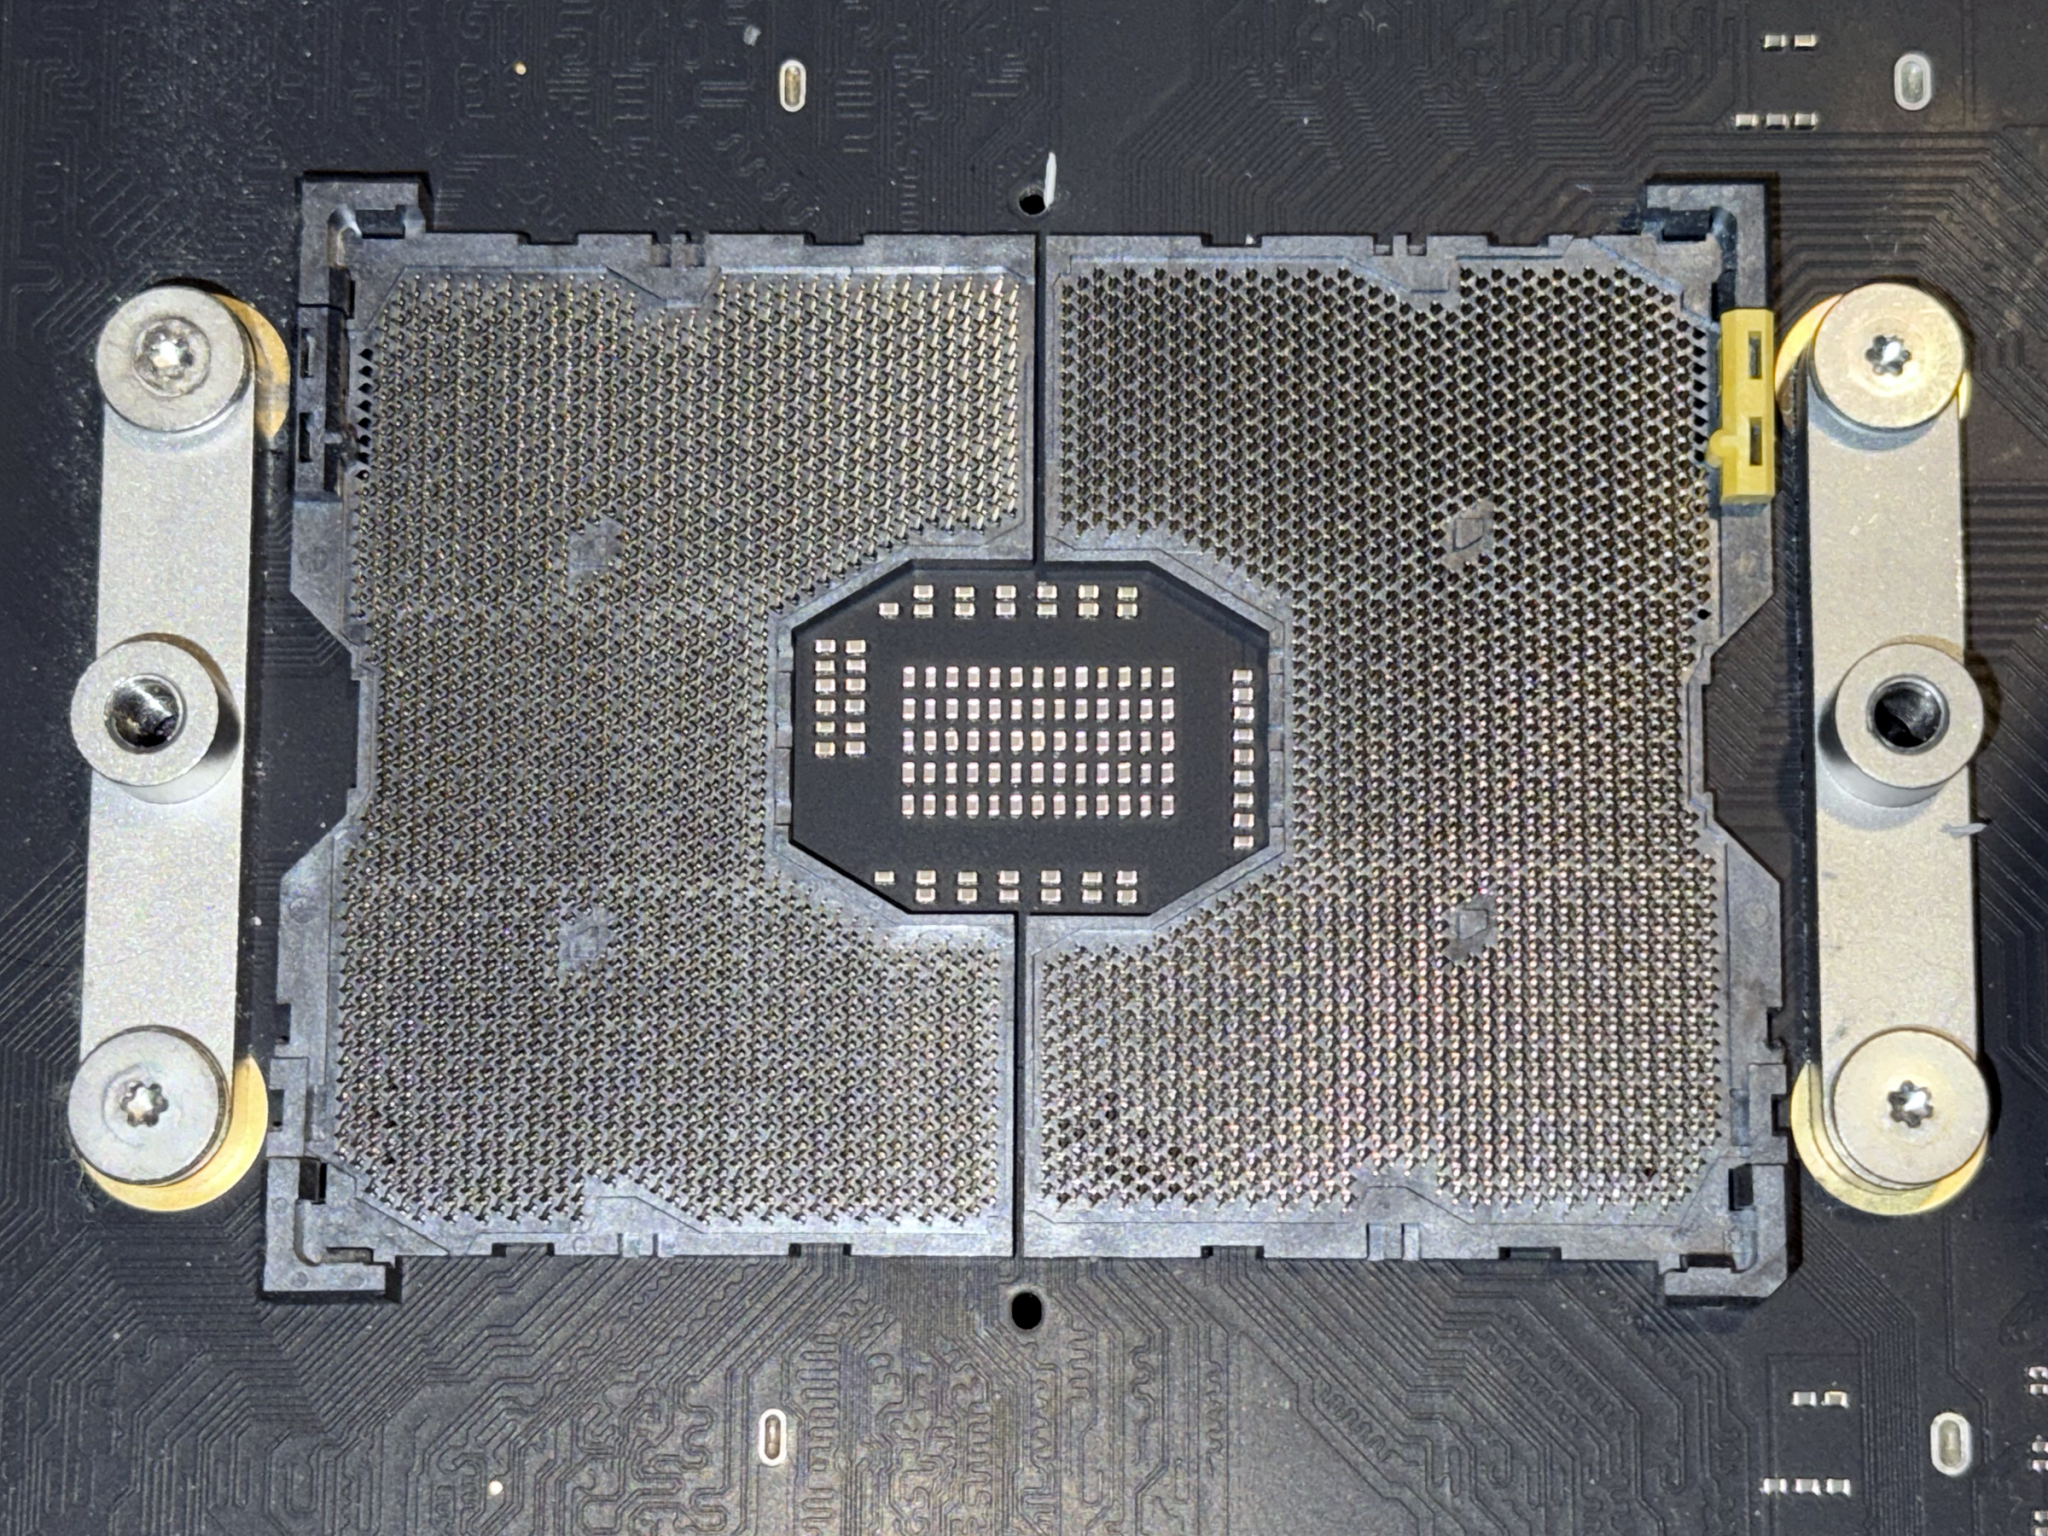
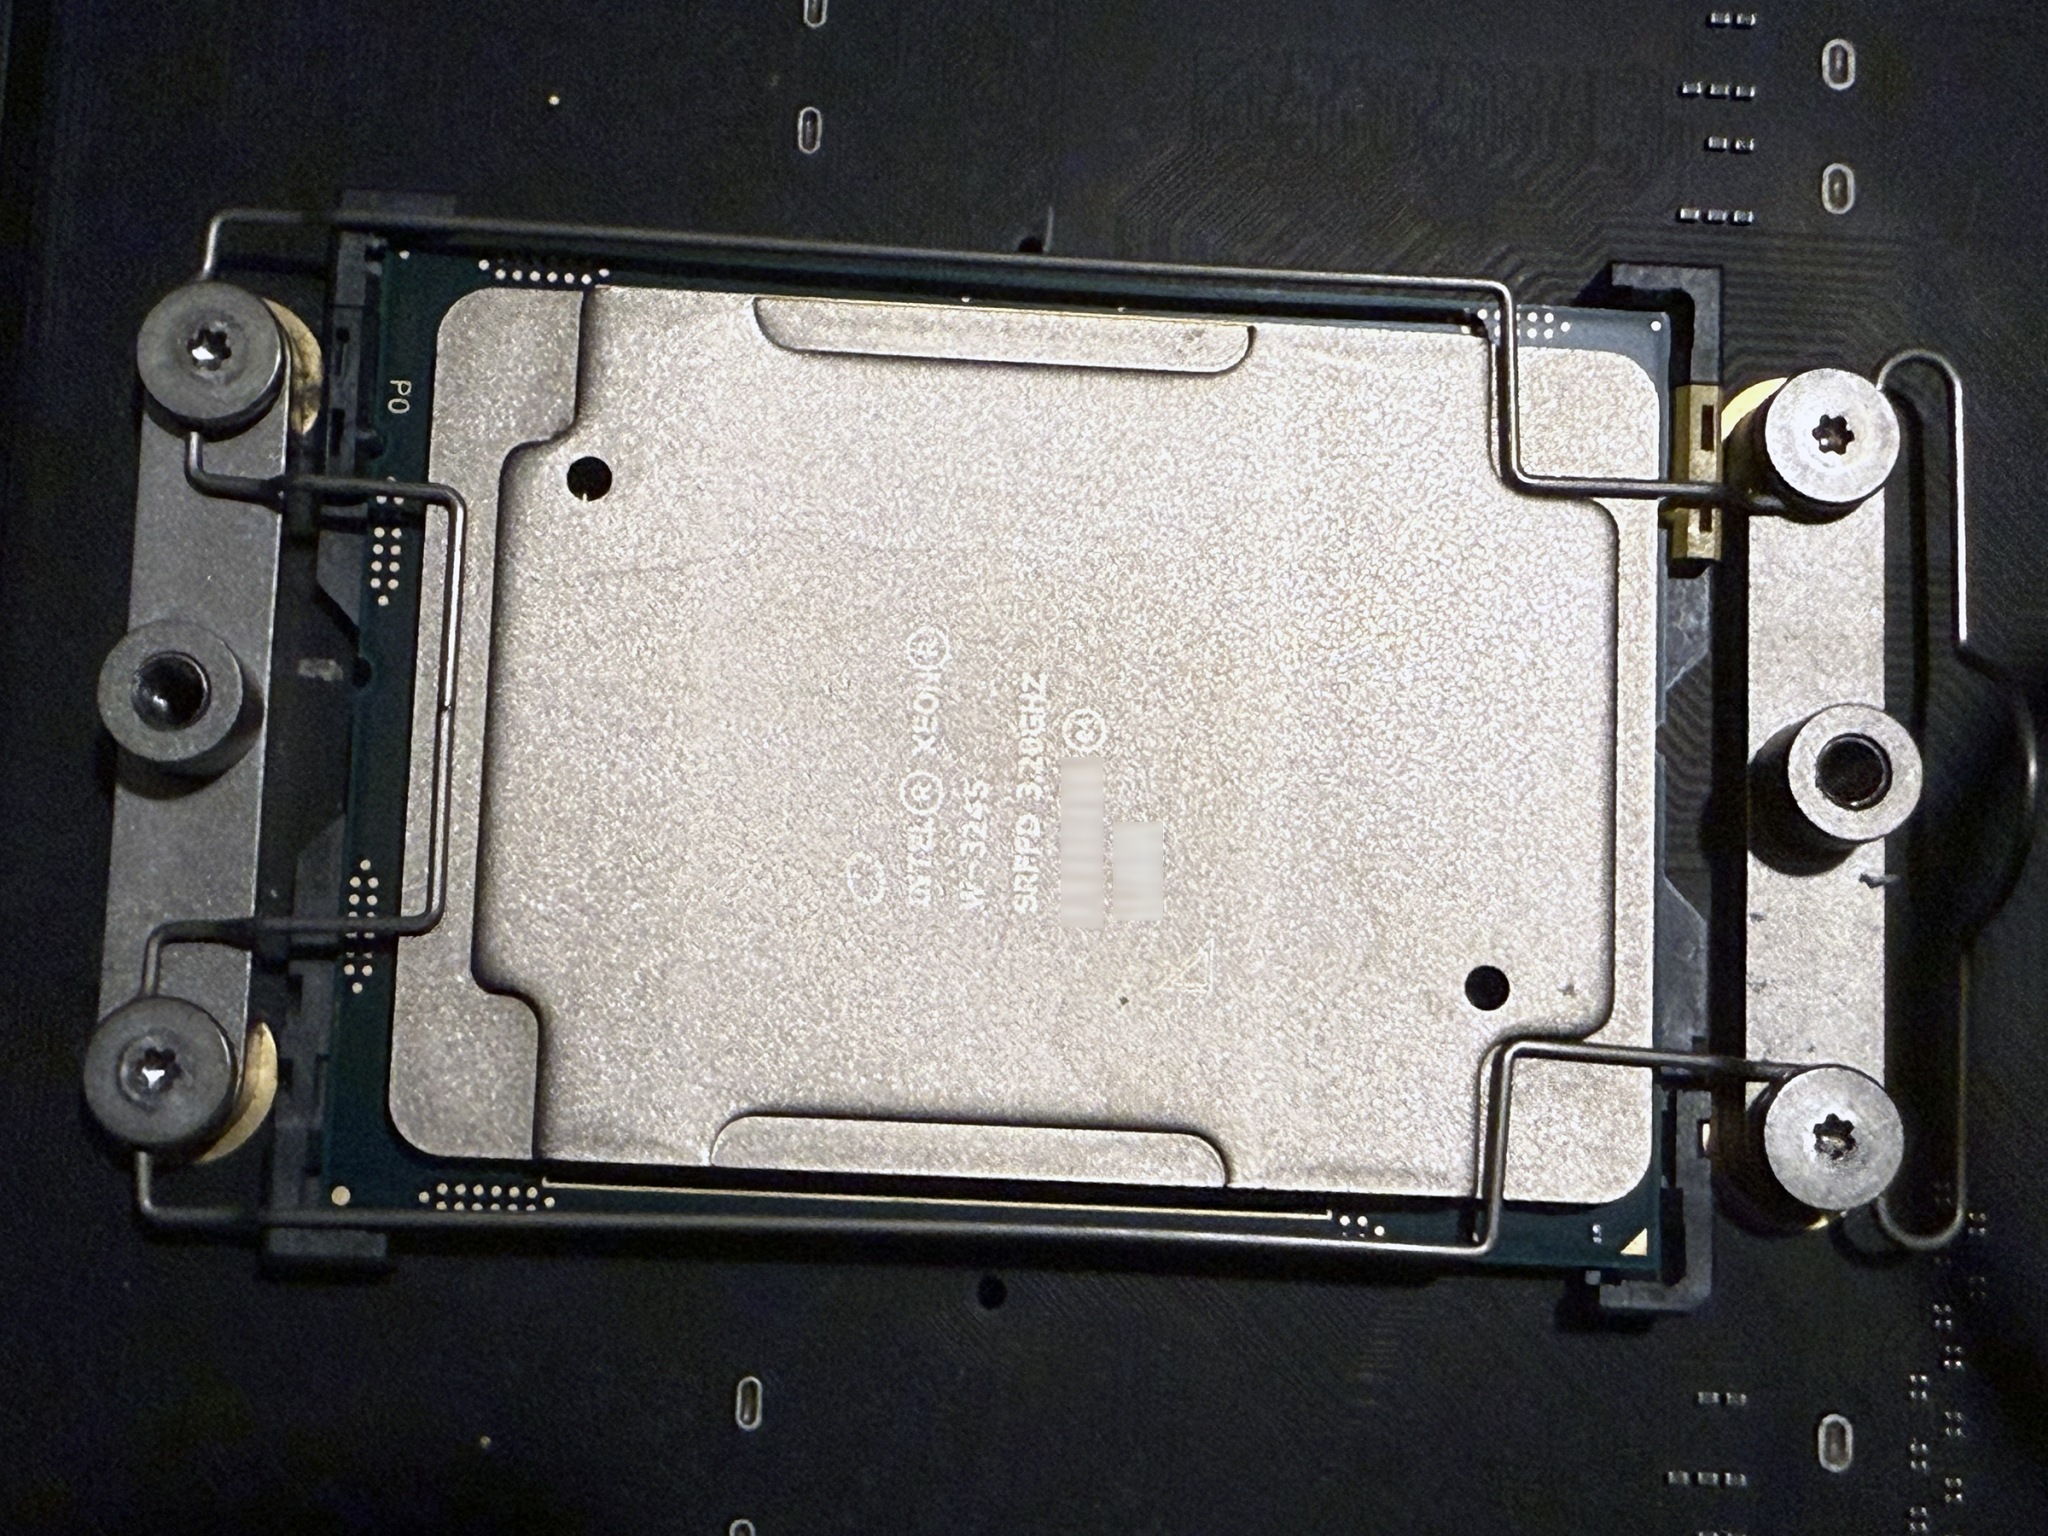
After carefully lifting the processor from the logic board socket (it comes off easily; this is more about having a good hold on it so as to not accidentally drop it), the original one can have the old thermal paste on it cleaned off and stored safely (some folks resell them but I’m keeping it as a backup). Carefully place the new one into the socket; the side with “P0” faces the front fans of the system (it seats easily; this is more about having a good hold on it so as to not accidentally drop it), retaining clip reinstalled, and thermal past applied to top of the processor (I use Noctua thermal paste; it spreads easily on its own once the heatsink is reinstalled requiring no pre-spreading).

The heatsink is reinstalled (aligning the slot on the top into the guide and slid back onto the logic board) with the T-15 torx screws (making sure not to overtighten them), heatsink cover reinstalled, outer case replaced, and reconnecting everything up.

In the past, I used to always worry about the system (Mac or PC) starting up correctly when making changes like this (based on past experiences from the old days). Nowadays, the process is straightforward. Tangent: I had to take apart most of my MSi Trident X just to upgrade it’s RAM (since it is a SFF, it’s basically a laptop logic board requiring the removal of a lot of other components (CPU fan, heatsink, and RTX 2080 Ti all needed to come off) that are tightly fitted. I eventually moved to this Thermaltake mini-ATX tower to not have to deal with that. Digressing…
I looked at what a then new configuration of this Mac Pro would’ve been back in 2019; $7,999 (with 32GB RAM, 256GB SSD, Radeon Pro 580x). Apple’s closest memory upgrade was to 384GB (six 64GB DIMM’s) for $6,000 (aftermarket was always cheaper; I got four 64GB DIMM’s for $750 which added to 4 16GB DIMM’s I originally replaced the 4 8GB DIMM’s with). The Radeon Pro W6800X Duo MPX module originally cost $5,000. Thus we’re already up to a mind-numbing $18,999 (2019 dollars & 2021 dollars for W6800X) sans state tax (if applicable). Even subtracting that $6,000 for memory (and going aftermarket which at the time would’ve been in the $1,000-$1,200 range), it’s still around $14K (in 2019 dollars). I couldn’t find the upgrade price to 512GB SSD though (these are the ones specific to the Mac Pro and need to be installed in order for the system to even boot).
I bought this near base Mac Pro (32GB RAM, 512GB SSD, Radeon Pro W5500X) as a certified refurb in 2023 for $4,099. With the additional memory, this 16-core Xeon (also brand new), and Radeon Pro W6800X Duo, the subtotal expenditure is $7,749 (while rare, it is possible to find used systems in very good to excellent condition with this config for around $1,700 less now). With the other storage upgrades: SoNNeT M.2 4×4 Silent PCIe Card ($299) with 4x4TB, 3x8TB SSD in the SoNNeT Fusion Flex J3i ($230), the total expenditure has still been under $10K.
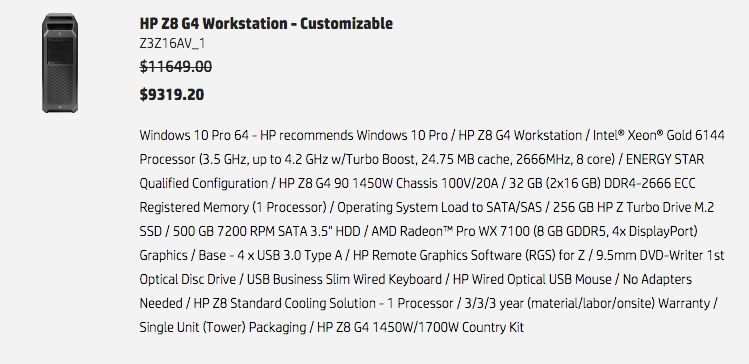
I previously also scoped out an HP Z8 Workstation during that same timeframe, and it was already close to $10K for a configuration closer to the base Mac Pro I ended up getting but with a slightly better Radeon Pro workstation GPU; the NVIDIA workstation GPU’s really cranked up the price of these Z8’s).
Out of curiosity, I priced out a current day HP Z8 G5 workstation as close to the base 2019 16-core Mac Pro config except with 64GB of memory. It came in just under $6,000 sans tax.

If I increased the memory to 256GB and added a GPU closer to what I am now running (the Radeon Pro W7900 below is better), the price skyrockets to $12,900 sans tax.

Thus the amount that I spent for my certified refurb plus all of the upgrades made (with more memory and storage), is still price competitive today for a Xeon based workstation. I’m probably going to go ahead and get another 256GB of RDIMM’s (around $675) since this is going to be my virtual machine system in the future.